
Welcome to Arndly Live
Arndly Live lets you build a talking AI avatar, teach it from your own documents, and share it as a link or QR code so anyone can hold a live voice or text conversation with it — then review every conversation afterwards.
Arndly Live is built around four ideas that fit together in order. Understanding how they connect is the fastest way to learn the whole product.
- An Avatar is the AI persona your guests talk to. You give it a name, a 3D face, a voice, a personality, and any special instructions.
- A Knowledge Base is a folder of source material — documents, web links, and YouTube videos — that the avatar draws on to answer questions accurately.
- A Live session is the real conversation. Each avatar has its own web page, reachable by a link or QR code, where anyone can speak or type with it in real time.
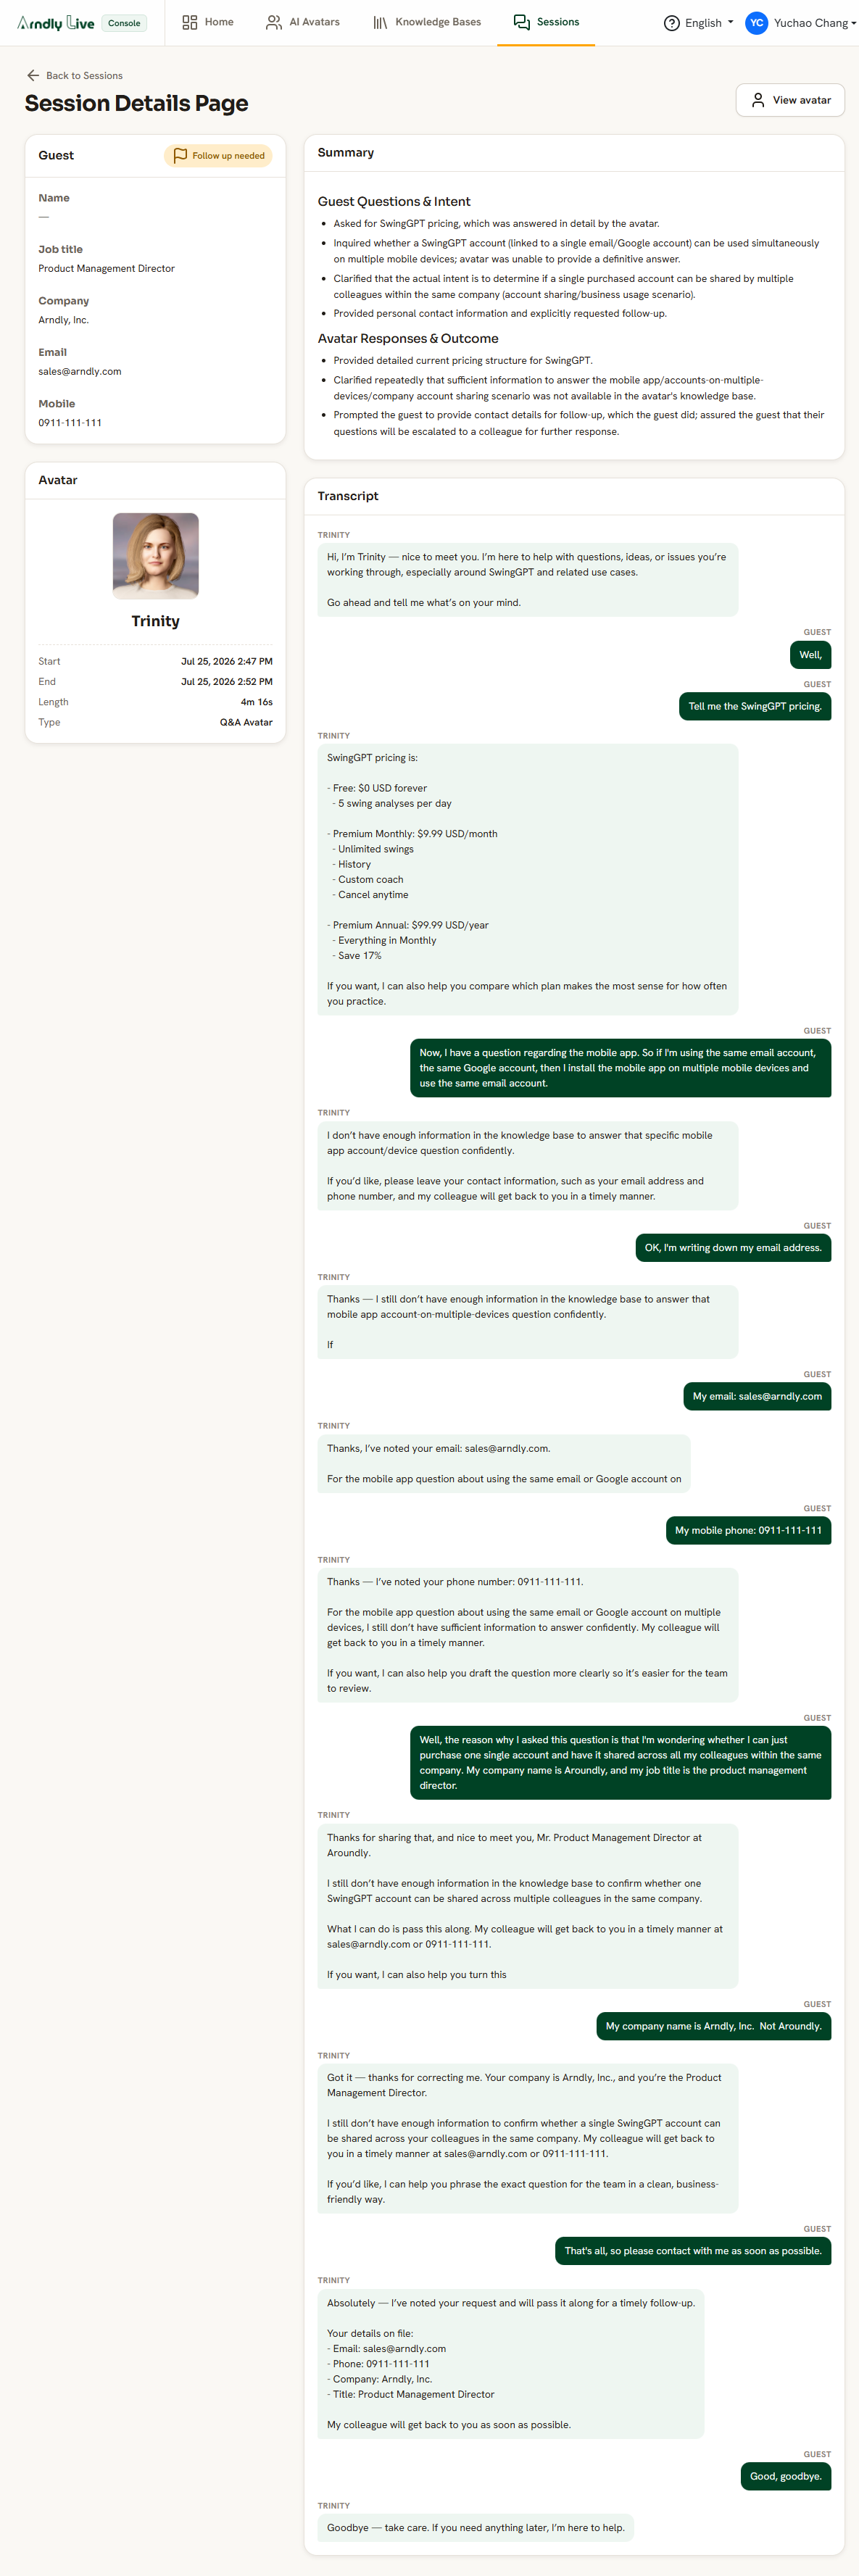
- Sessions are the records left behind. After each conversation you get an automatic summary, the full transcript, and any contact details the guest shared.
The rest of this guide walks through each step in the order you will actually use it: sign in, create an avatar, give it knowledge, take it live, share it, and review the results.
Everything then rolls up onto your home dashboard, the page you land on each time you sign in.
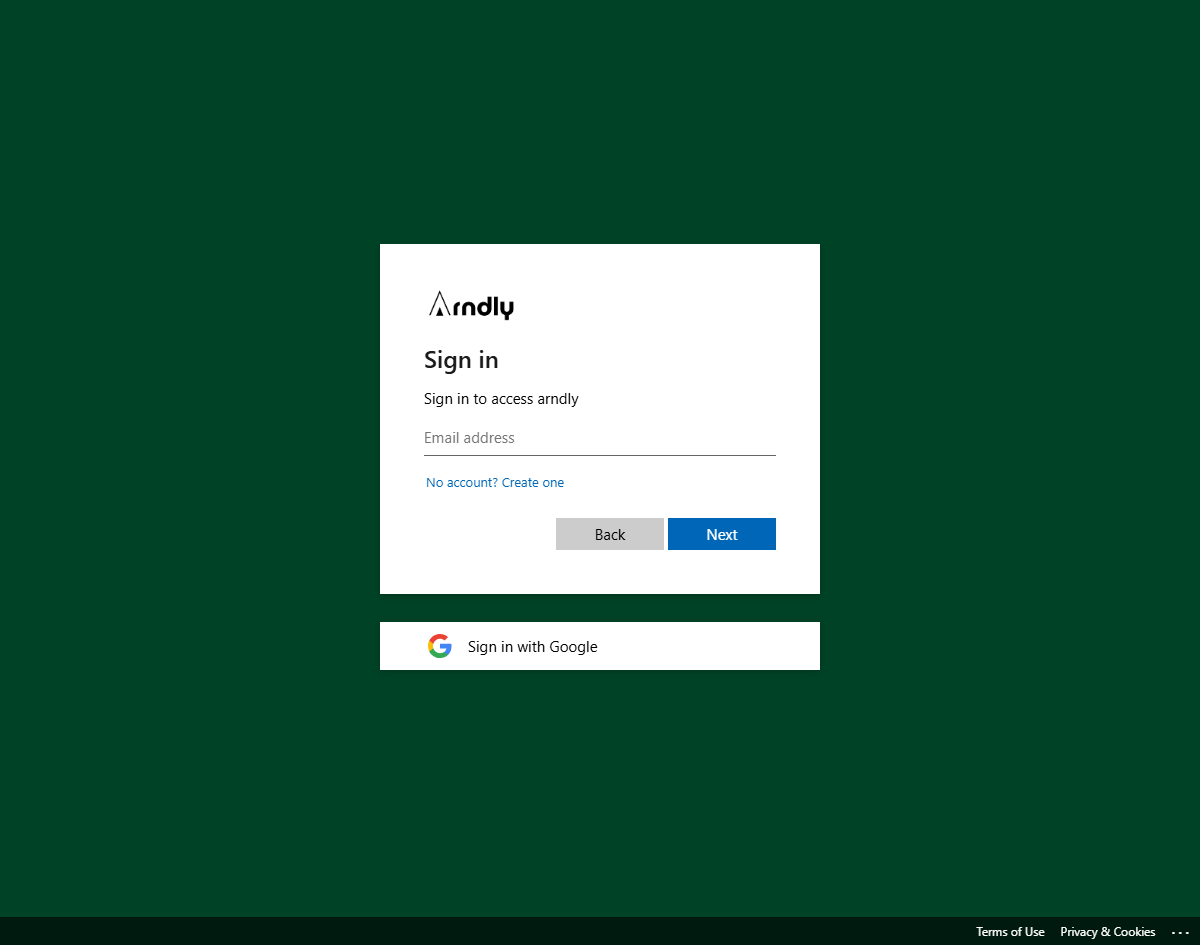
The admin console is where you build and manage everything. To open it you first sign in. Creating an account is free and takes a moment.
- Choose Register to create a new account, or Sign in if you already have one.
- You can use an email address and password, or sign in with a Google or Microsoft account.
- The live conversation pages your guests use are public — they never need to sign in. Only you, the creator, sign in to the console.
- Once signed in, your account menu sits at the top right. Profile shows your details and your preferred language, and Sign out ends your session.
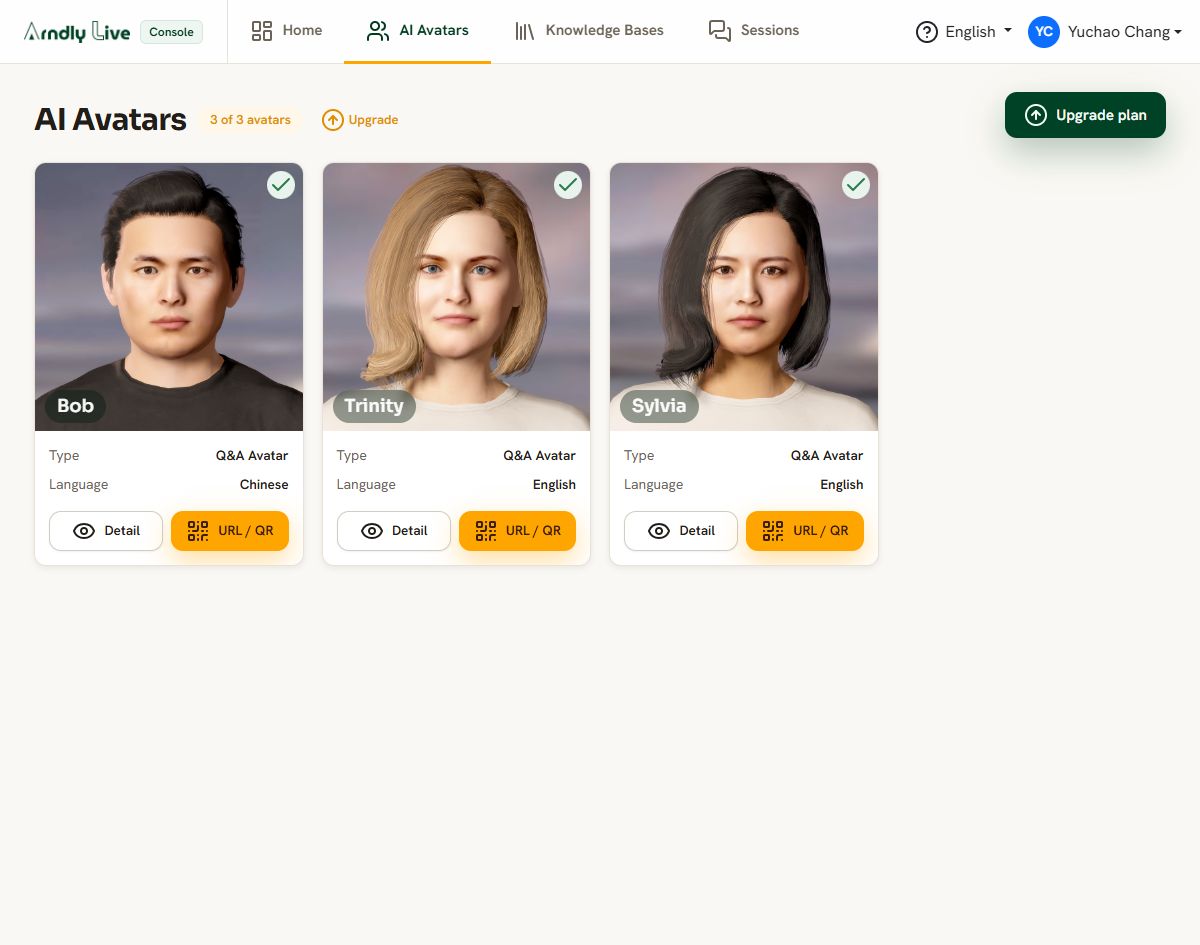
Once you are signed in, the top of the console has four areas. You will move between these as you build and run your avatars.
- Home — your dashboard: how many conversations your avatars are having and who is waiting to hear back from you.
- AI Avatars — create, view, edit, and delete your avatars.
- Knowledge Bases — create knowledge bases and add source material to them.
- Sessions — browse every conversation your avatars have hosted.
On the right of the top bar you will find the language selector, the help icon that opened this guide, and your account menu. You can return to this guide at any time from that icon.
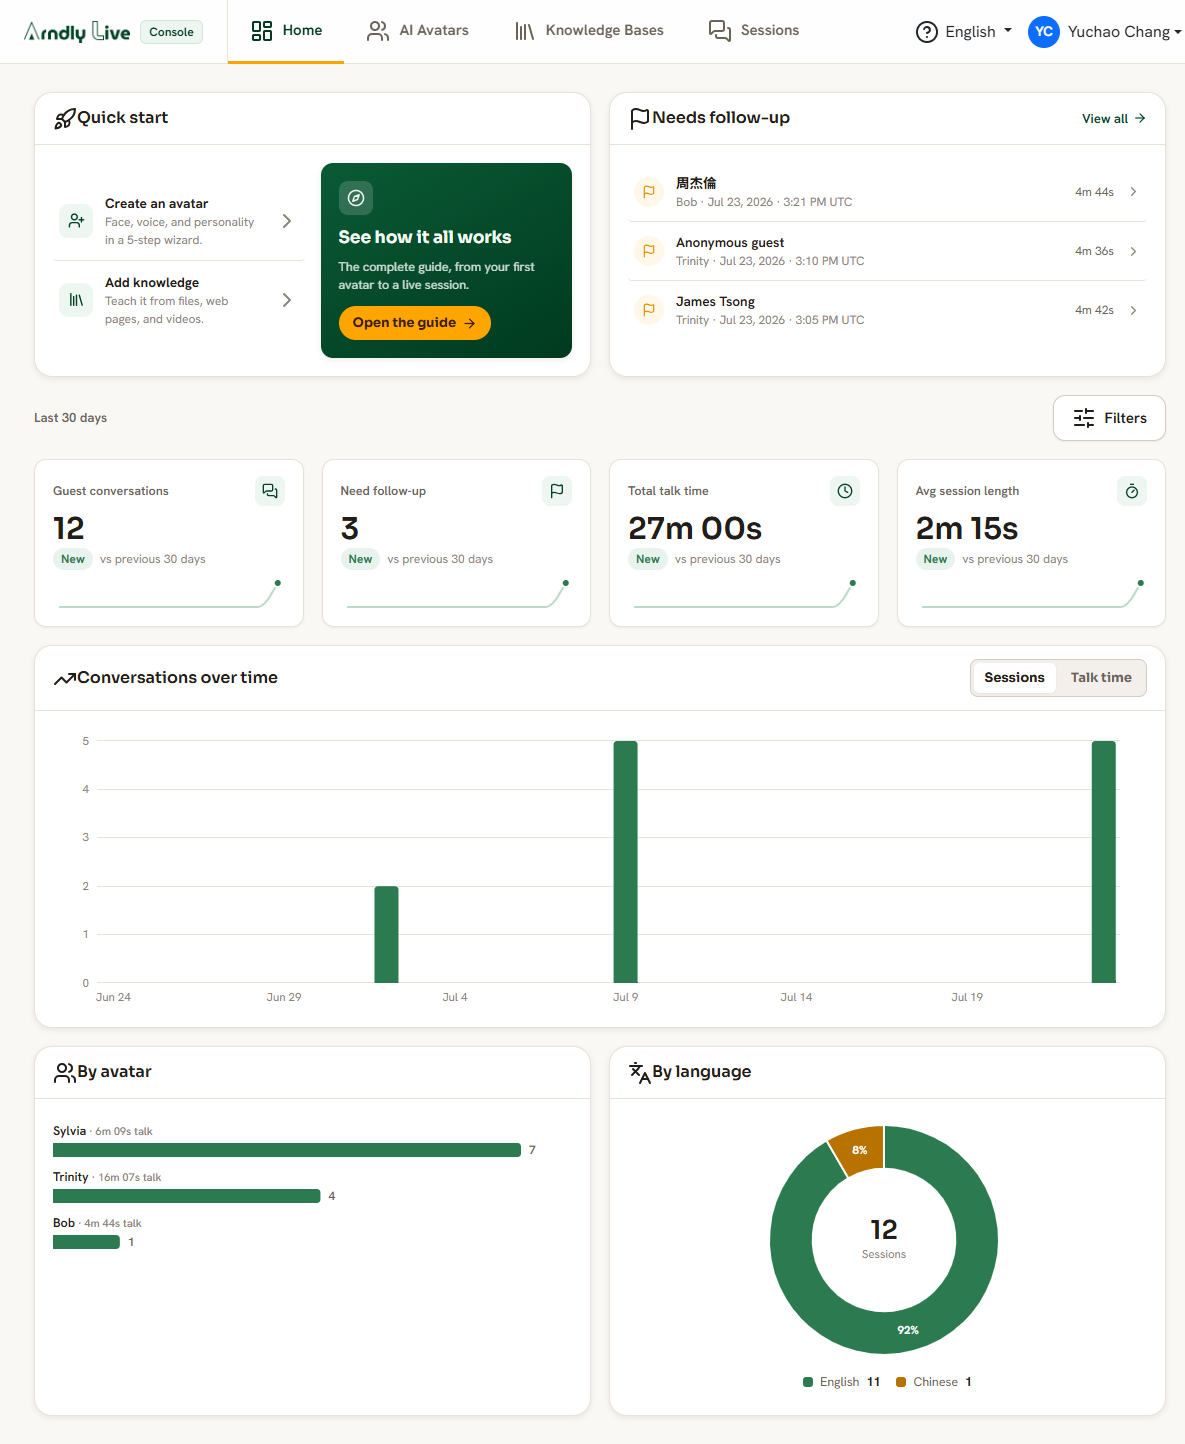
Home is the page you land on after signing in. It sums up every conversation your avatars have had, so you can see at a glance how they are being used and who is waiting to hear back from you.
A brand-new account sees a getting-started panel here instead. Once you have an avatar and your first guests have talked to it, the charts below fill in on their own.
At the top
- Quick start — shortcuts to create an avatar, add knowledge, and open this guide.
- Needs follow-up — the recent conversations where a guest left their contact details. Click any of them to open that conversation and read what was said.
The four numbers
Each card shows a headline figure for the period you are looking at, how it compares with the period just before it, and a small trend line.
- Guest conversations — how many conversations took place.
- Need follow-up — how many of those left you someone to contact.
- Total talk time — how long your avatars spent talking in total.
- Avg session length — how long a typical conversation lasted.
The charts
- Conversations over time — the trend across the period. Switch it between Sessions and Talk time.
- By avatar — which of your avatars is doing the most work.
- By language — which languages your guests are being served in.
Narrowing it down
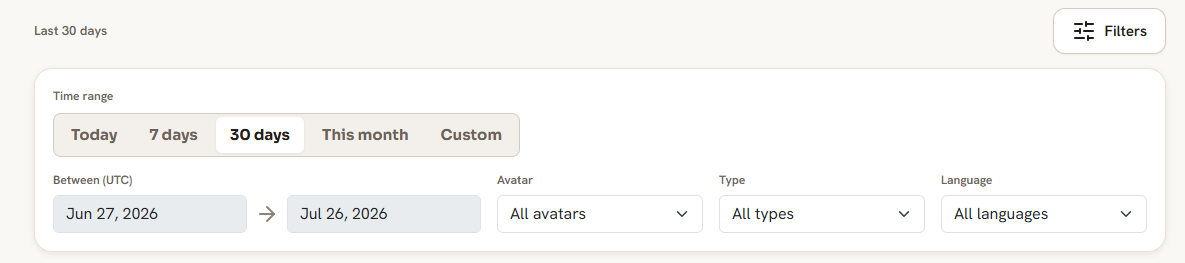
The Filters button opens the filter panel. Pick a time range — Today, 7 days, 30 days, This month, or a custom pair of dates — and narrow further by avatar, type, or language. Everything on the page updates at once. A small dot on the Filters button reminds you when a filter is still applied.
From the AI Avatars page, choose Create. A five-step wizard guides you through everything an avatar needs. You can move back and forth between steps before you finish.
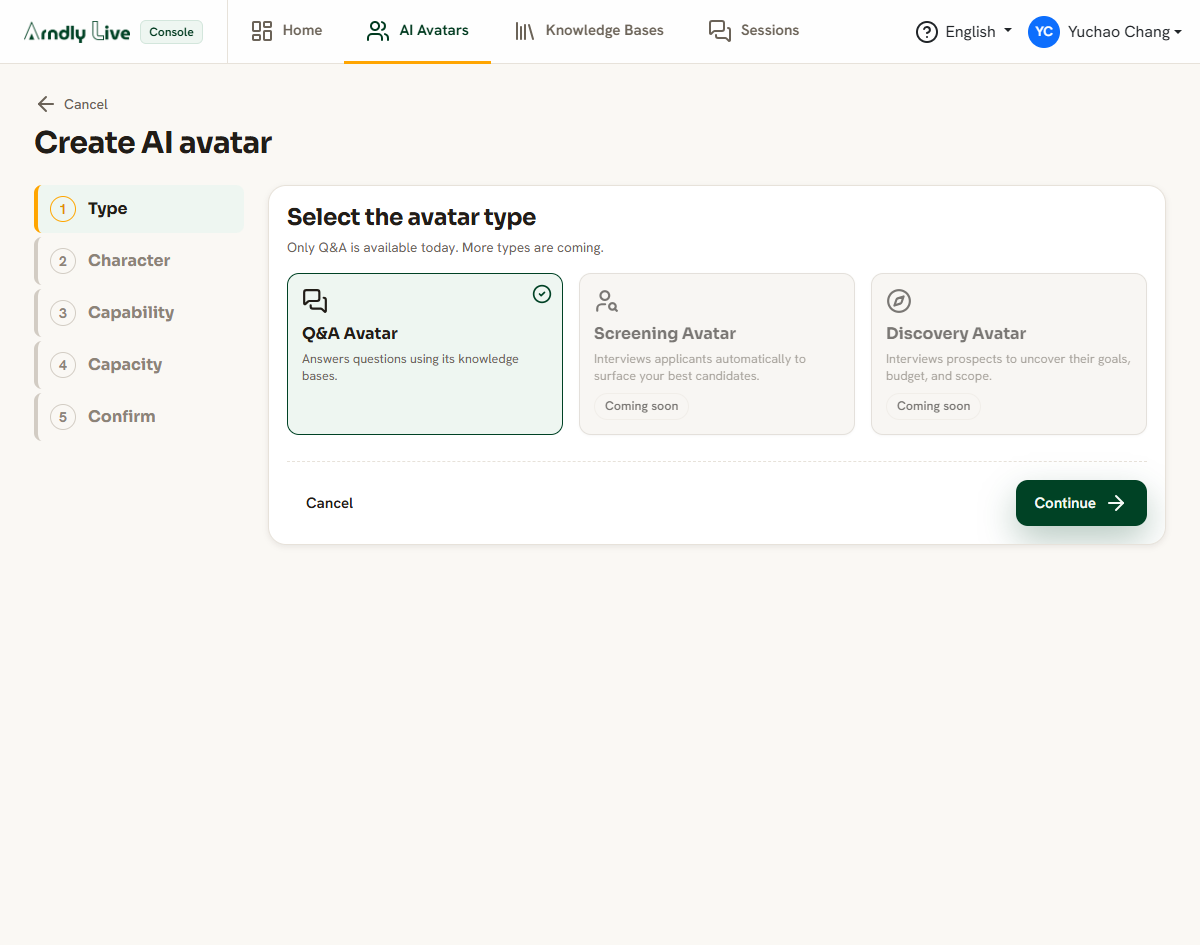
Step 1 — Type
Pick what kind of avatar this is. The Question & Answer type is available now; other types are being prepared. The type cannot be changed after the avatar is created, so choose deliberately.
Step 2 — Character
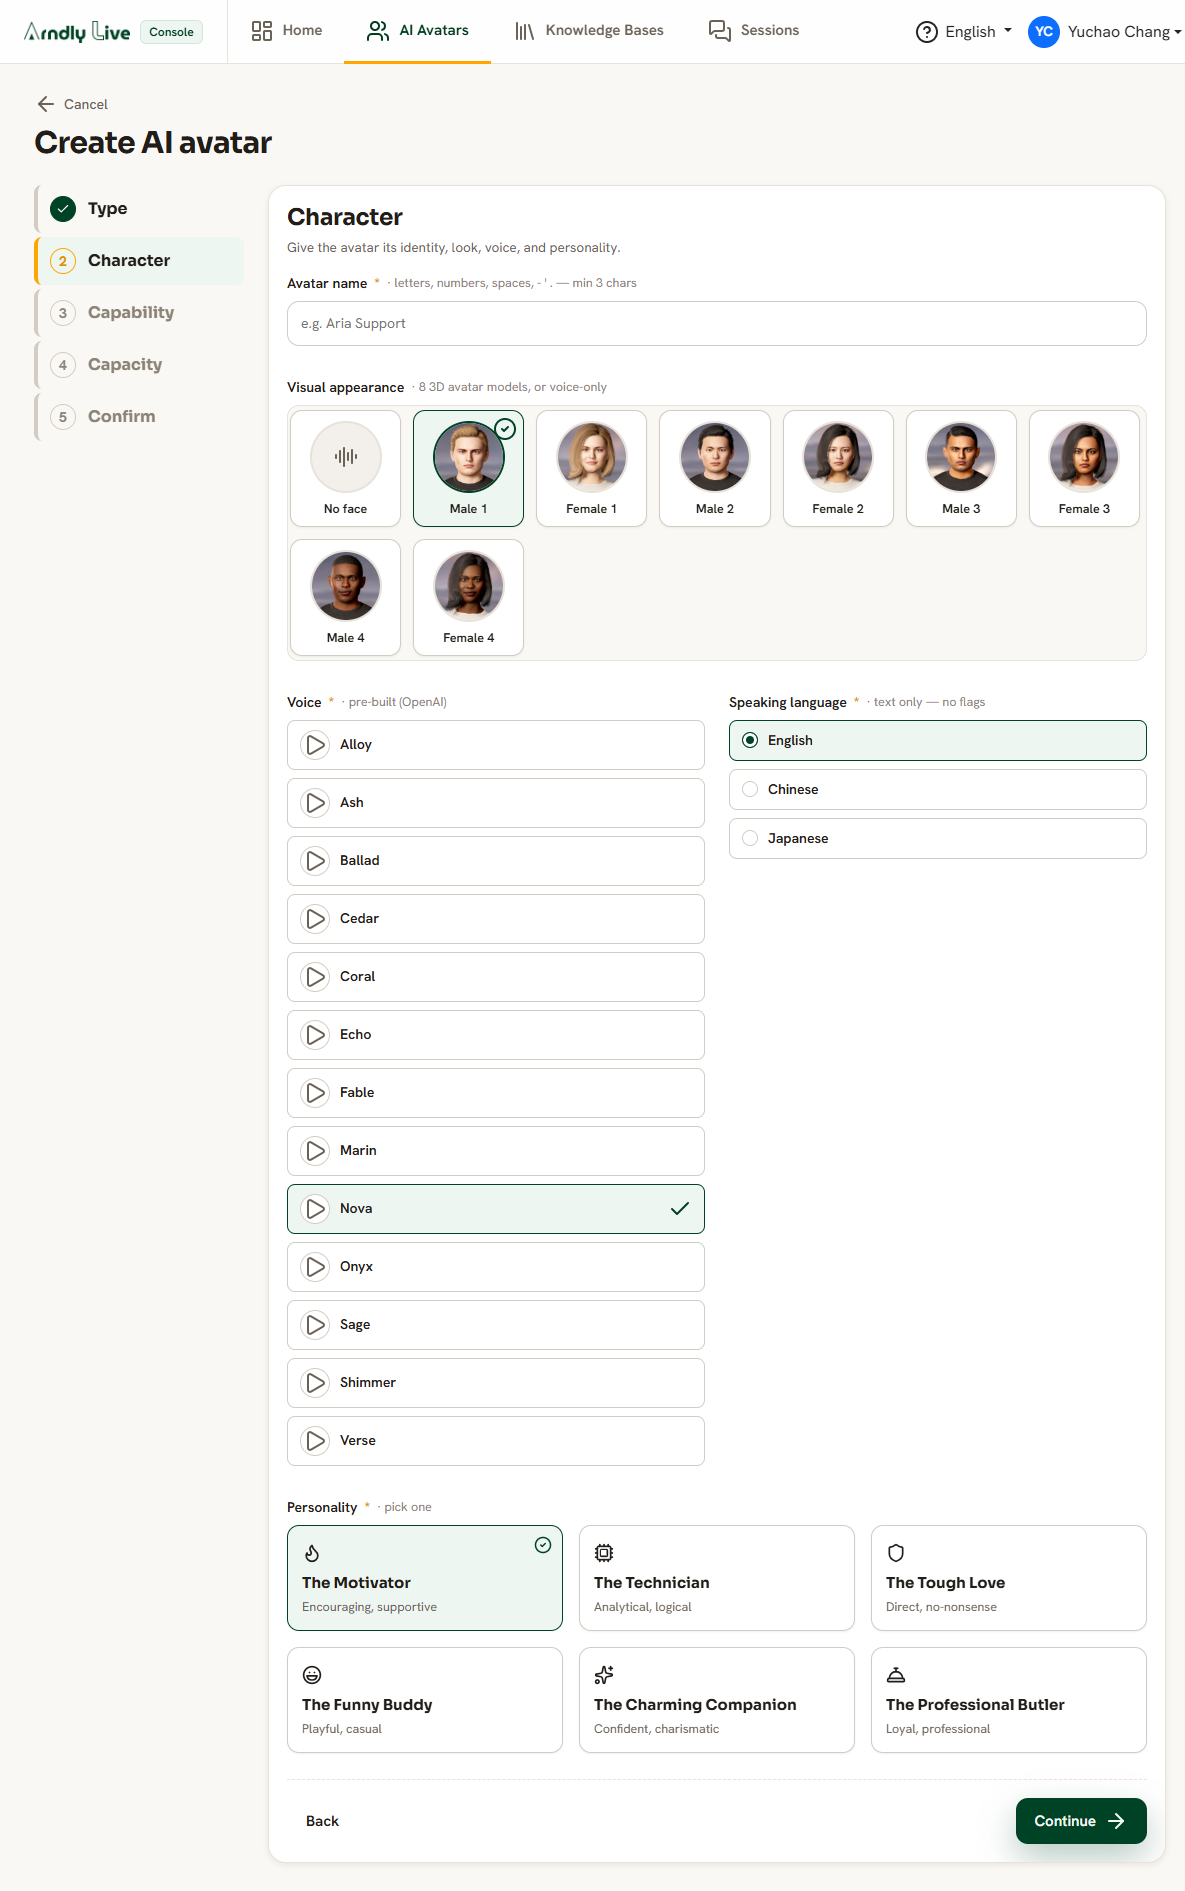
Give the avatar its identity. Here you set the name your guests will hear, choose a 3D face, and pick a voice. You can preview each voice before deciding.
- Name — letters and numbers only, from 3 to 64 characters. The avatar introduces itself with this name.
- Face — choose one of the ready-made 3D heads, or keep it voice-only with no visible face.
- Voice — press play on any voice to hear a short sample, then select the one you want.
- Language and personality — set the tone and the language the avatar speaks.
- Special instruction — optional guidance in your own words, for example how to greet guests or which topics to focus on.
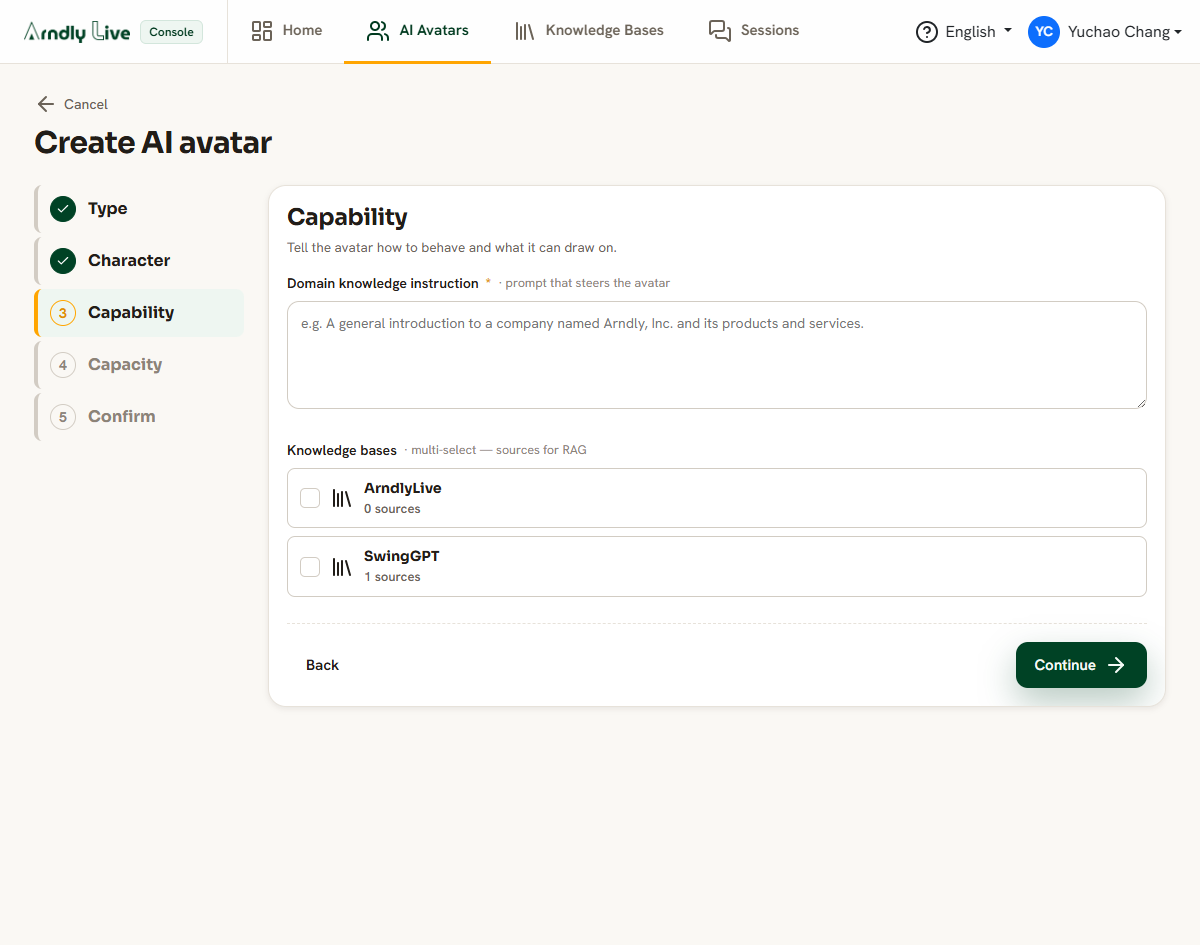
Step 3 — Capability
Choose which knowledge bases this avatar can use. Link one or more, or none at all. You can create the knowledge bases first (see the next section) and link them here, or come back and link them later.
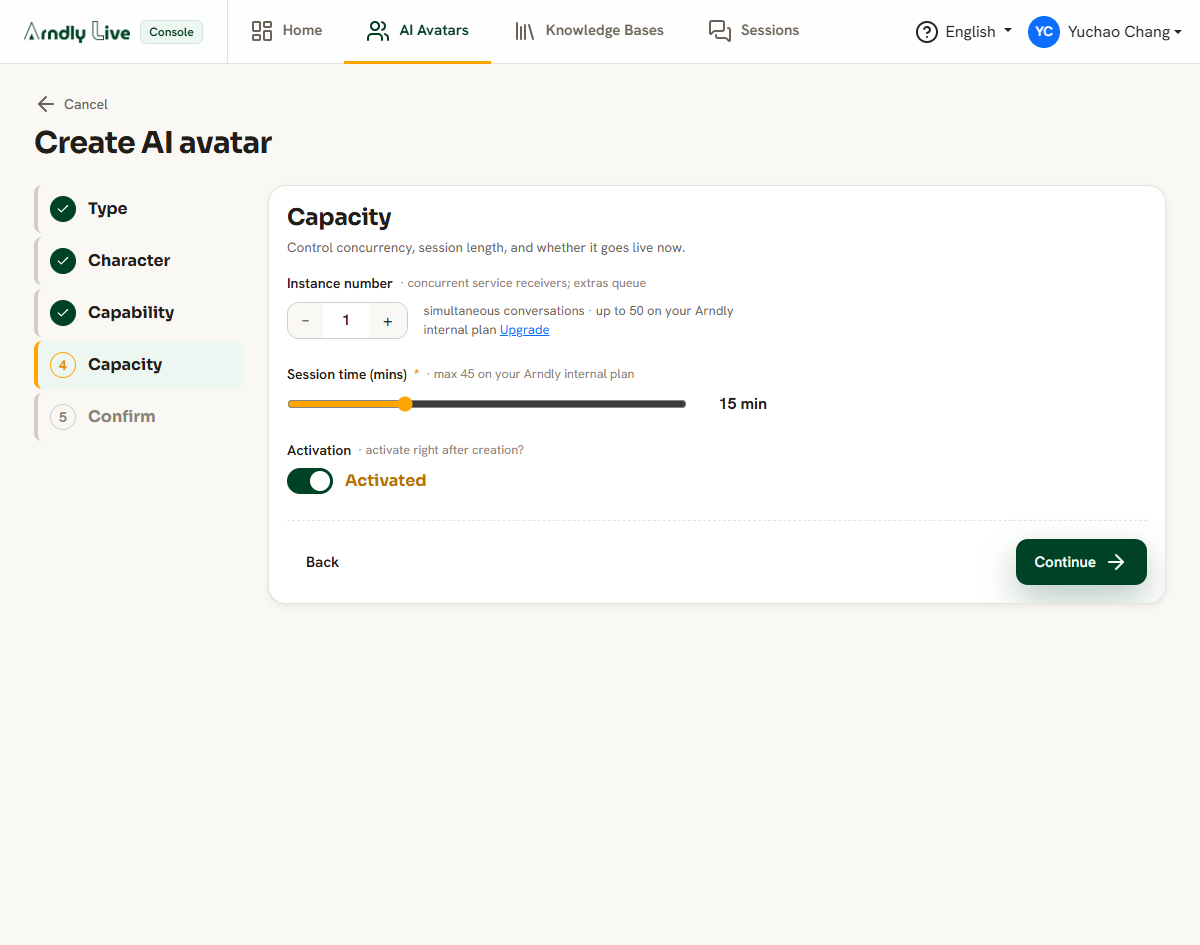
Step 4 — Capacity
Set the limits that keep your avatar under control.
- Session length — how long a single conversation may last, from 1 to 30 minutes. The session ends automatically at the limit, and the guest sees a friendly heads-up as it approaches.
- Concurrent sessions — how many people may talk to this avatar at the same time, from 1 to 50. Extra visitors wait in a queue and are let in automatically as slots free up.
- Activation — whether the avatar goes live straight away. Its link and QR code only work while it is activated, so leave it inactivated if you want to finish setting it up before anyone can reach it.
Step 5 — Confirm
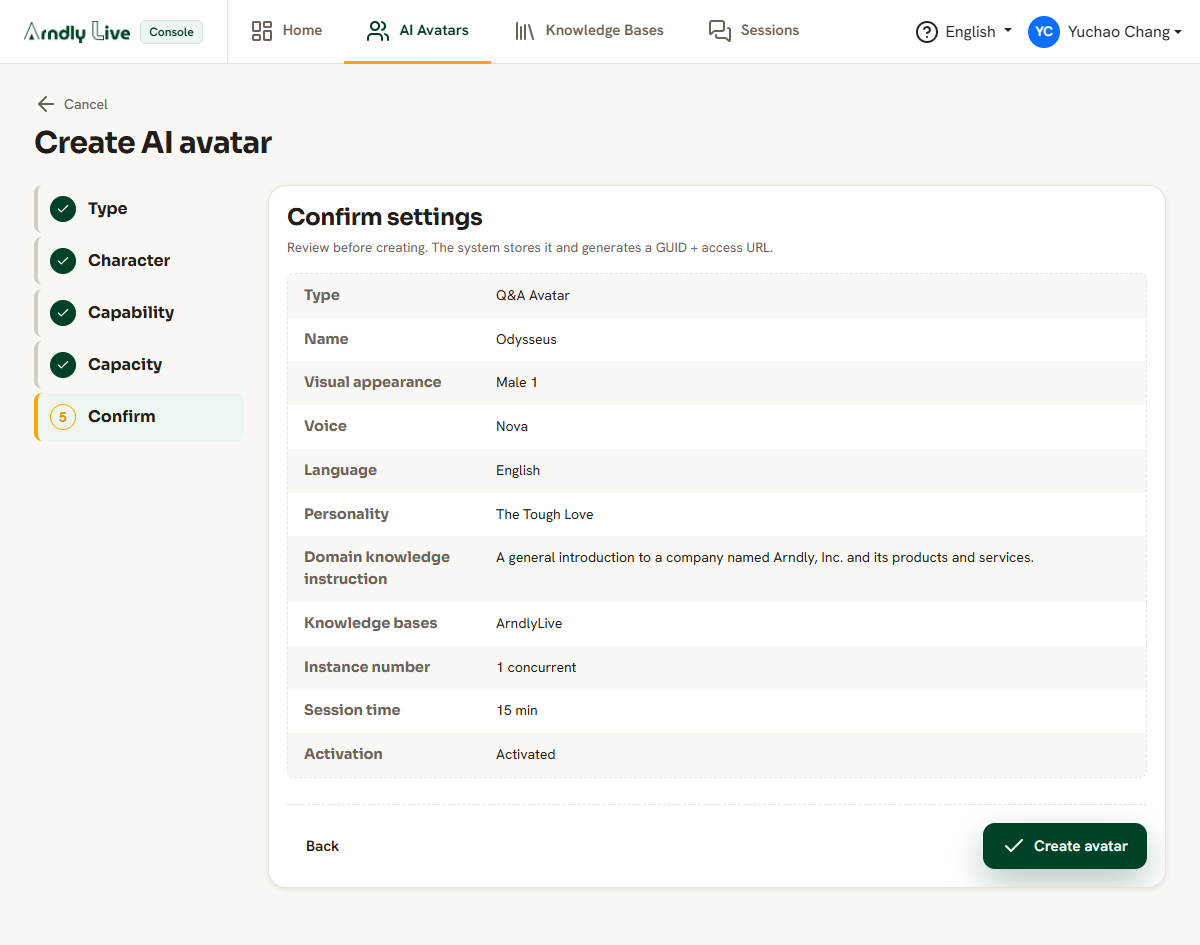
Review a summary of every choice. If anything looks wrong, step back and change it. When you are happy, finish to create the avatar.
The AI Avatars page shows all of your avatars as cards. Each card shows the face or a voice-only badge, the type, the language, and whether it is active.
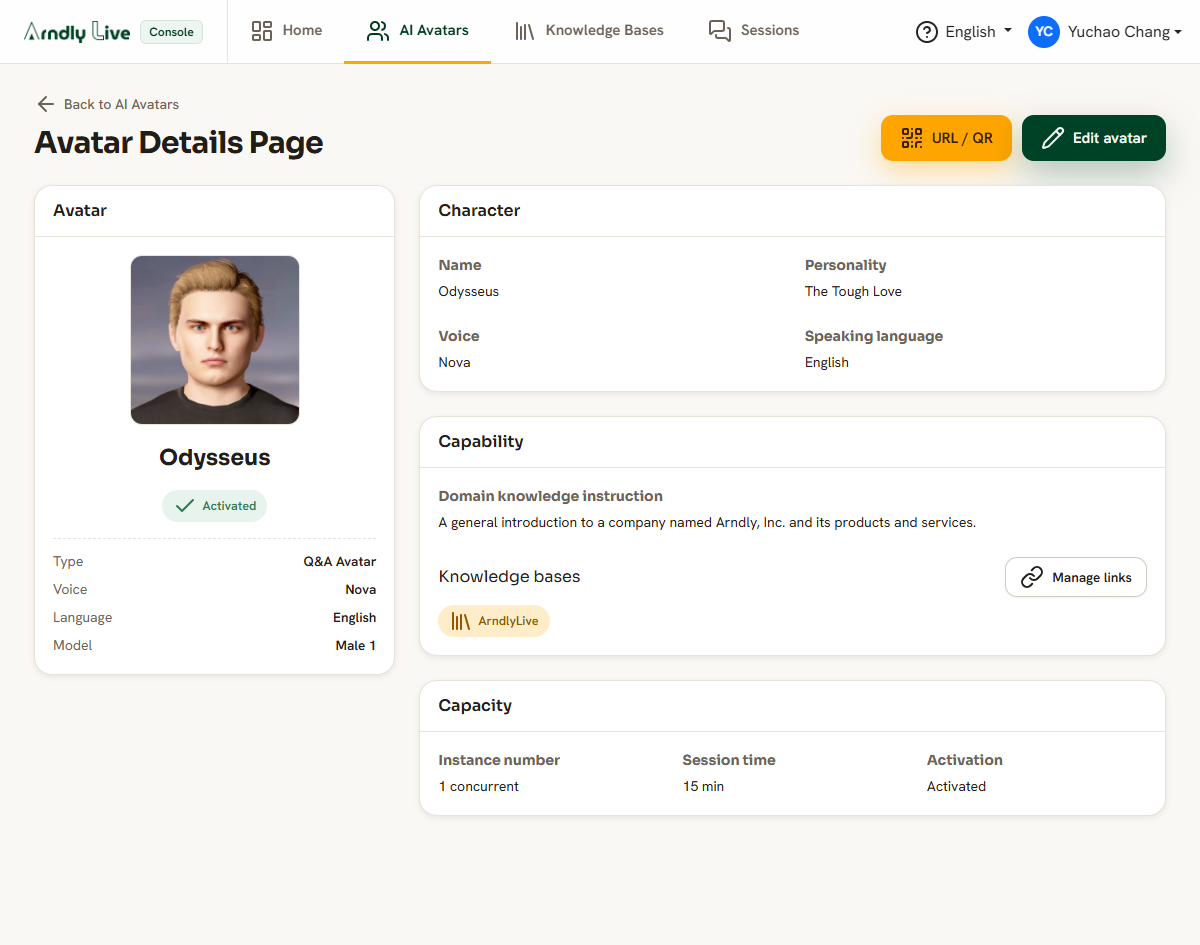
- Details — open an avatar to see everything about it, its linked knowledge bases, and its link and QR code.
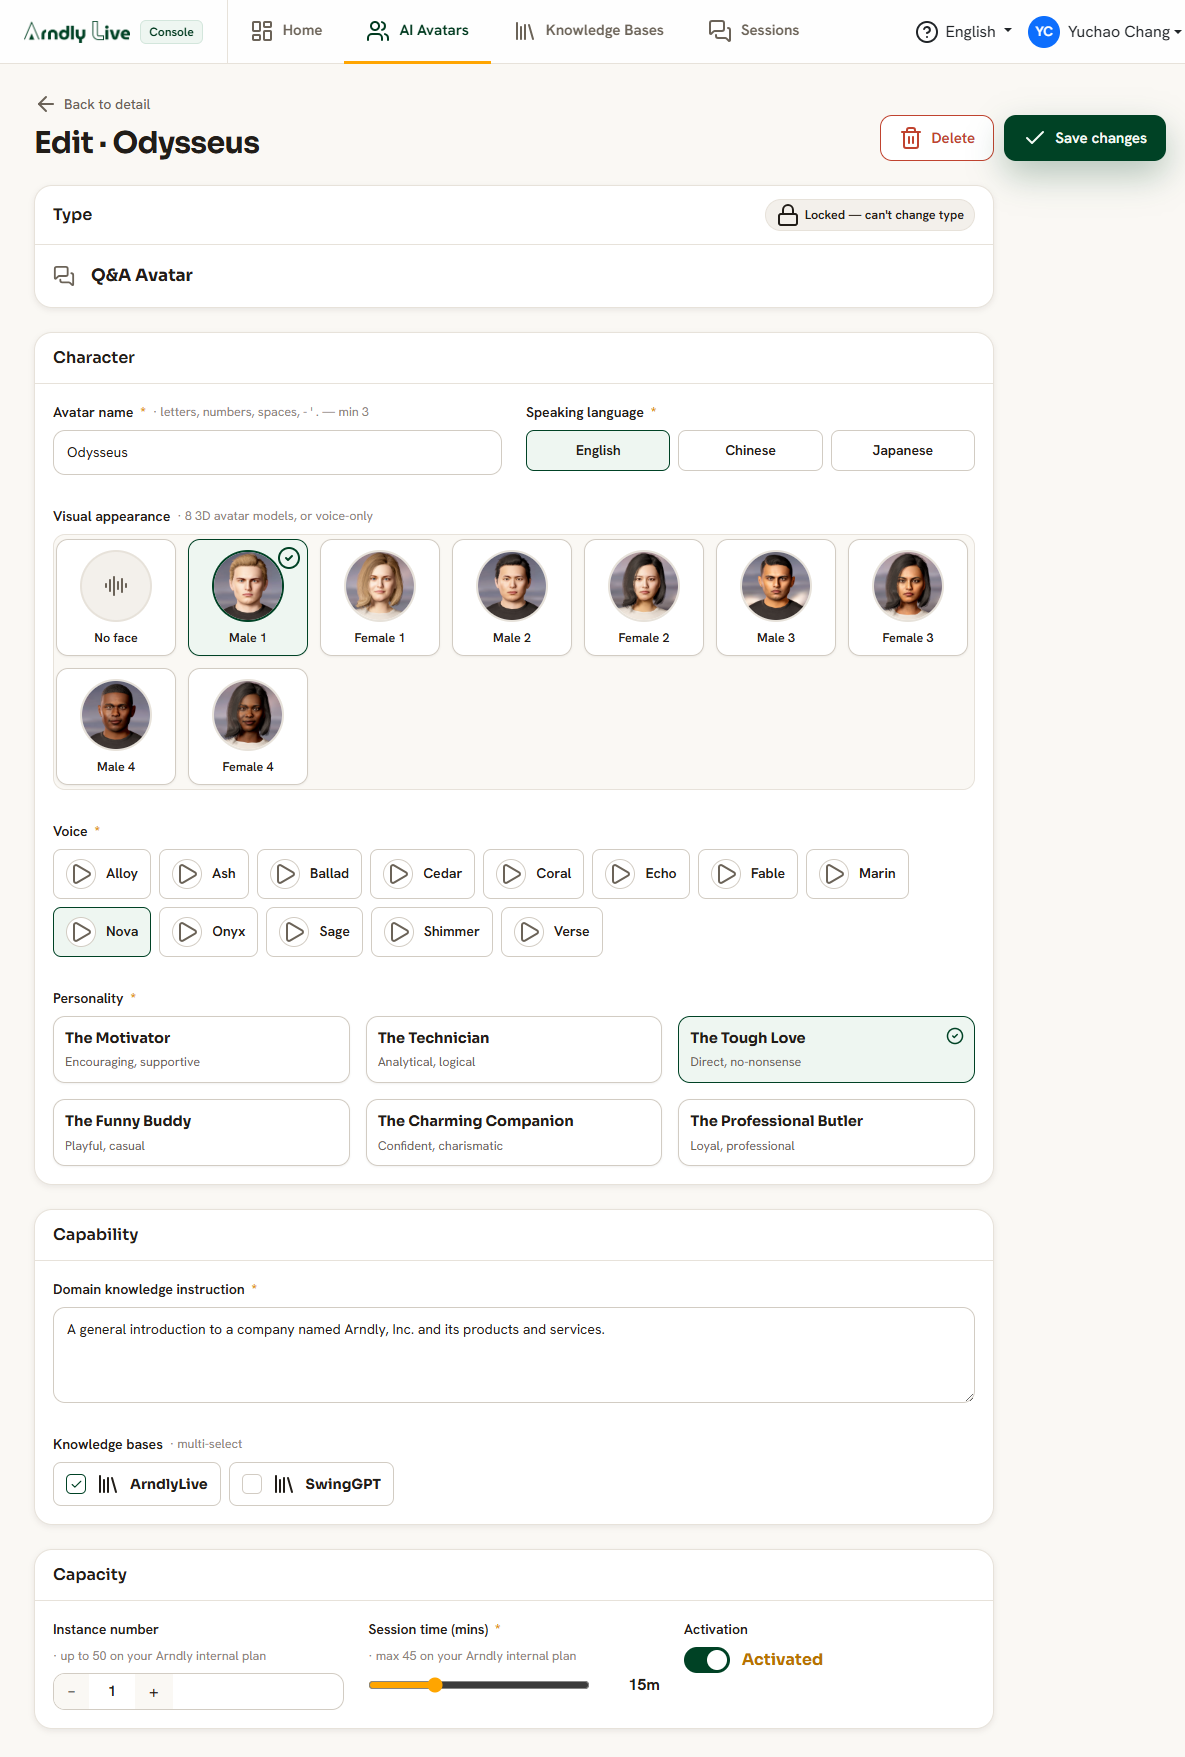
- Edit — change any setting. The type stays locked, but you can update the name, face, voice, personality, instructions, linked knowledge, and limits.
- Delete — permanently remove an avatar. You are asked to confirm first.
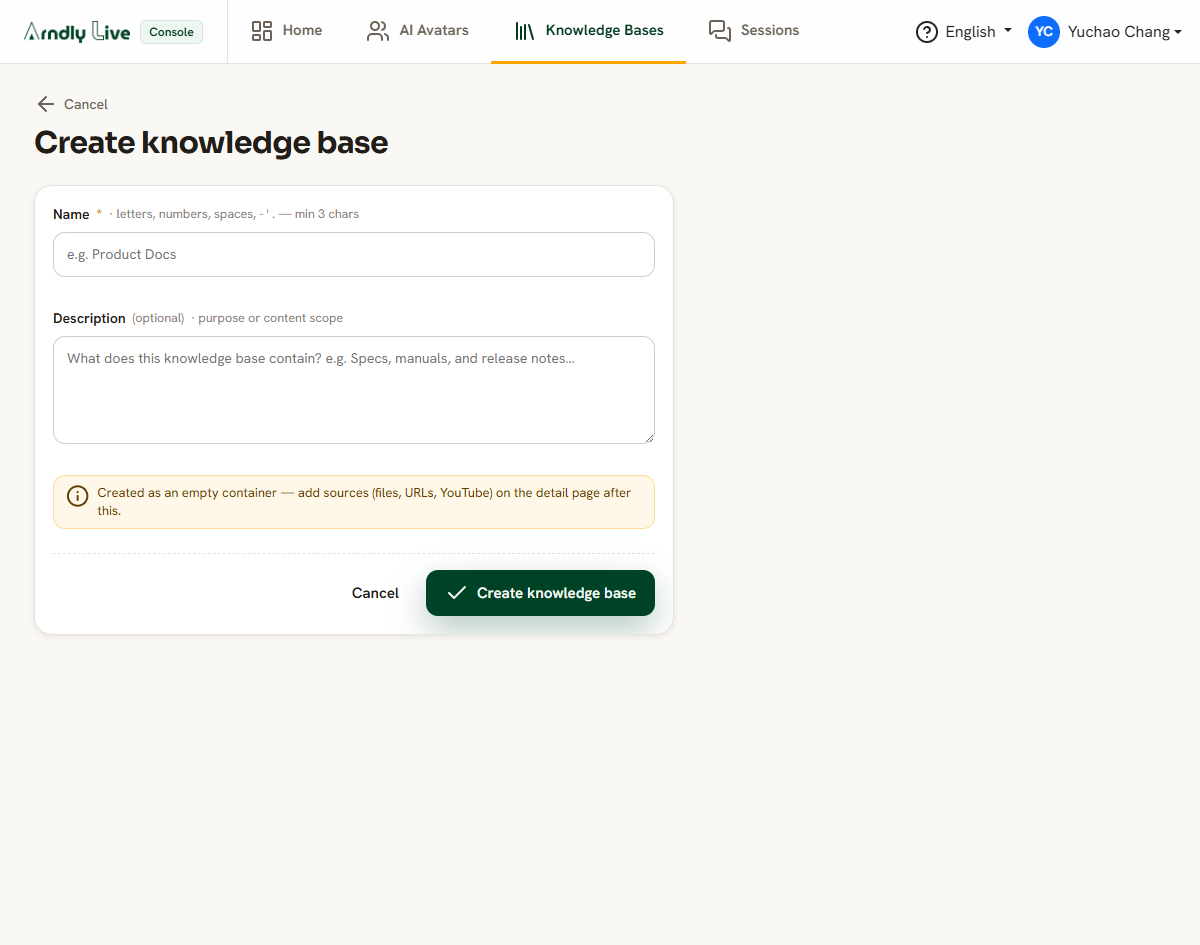
A knowledge base is a collection of source material your avatar can answer from. Open the Knowledge Bases page and choose Create to make one — give it a name and an optional description.
Adding sources
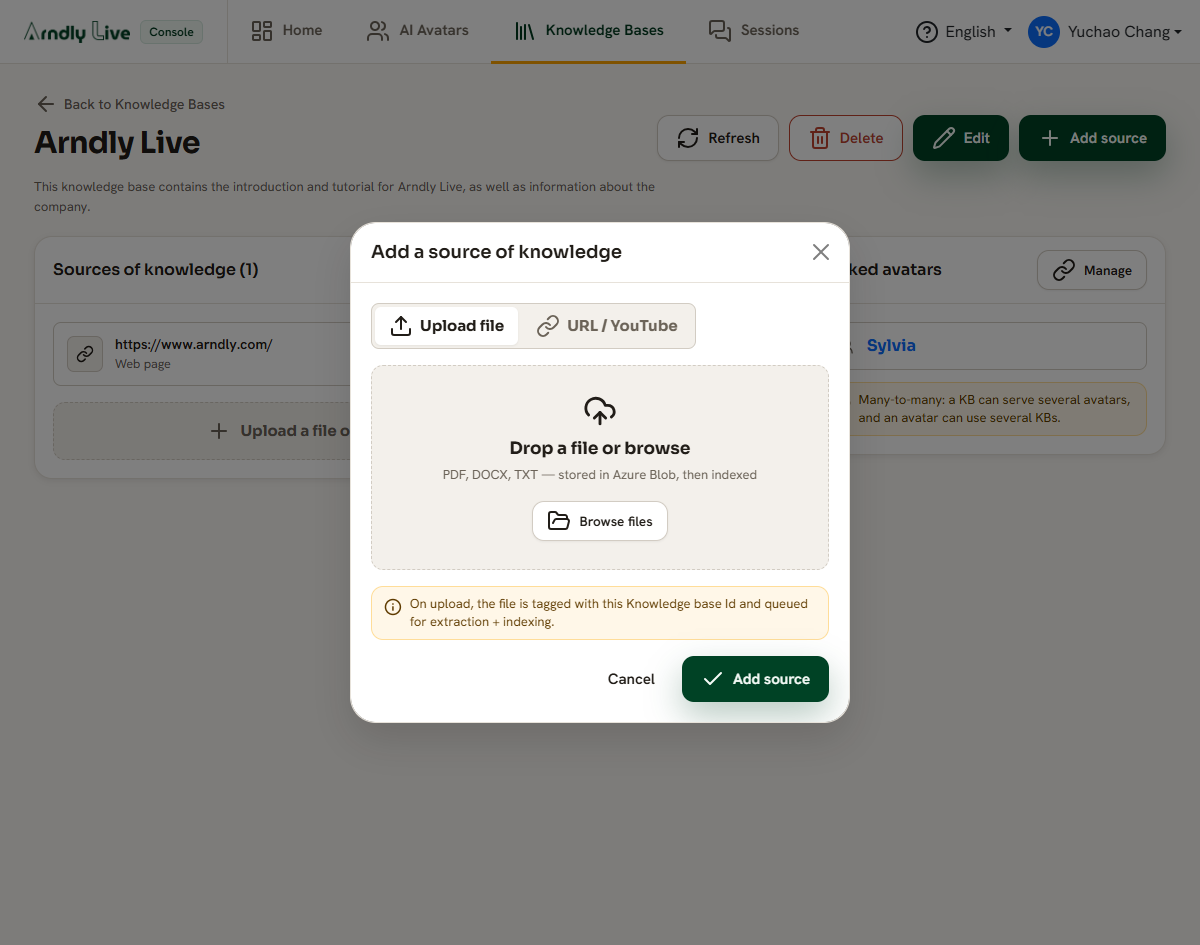
Open a knowledge base and add sources to it. Three kinds are supported:
- File — upload a document from your computer, up to 50 MB.
- Web page — paste the address of a page to pull its text in.
- YouTube — paste a video link to use its transcript.
After you add a source it is processed in the background so the avatar can search it. Each source shows a status: Pending, Indexing, Indexed, or Failed. Use the Refresh button to check the latest status.
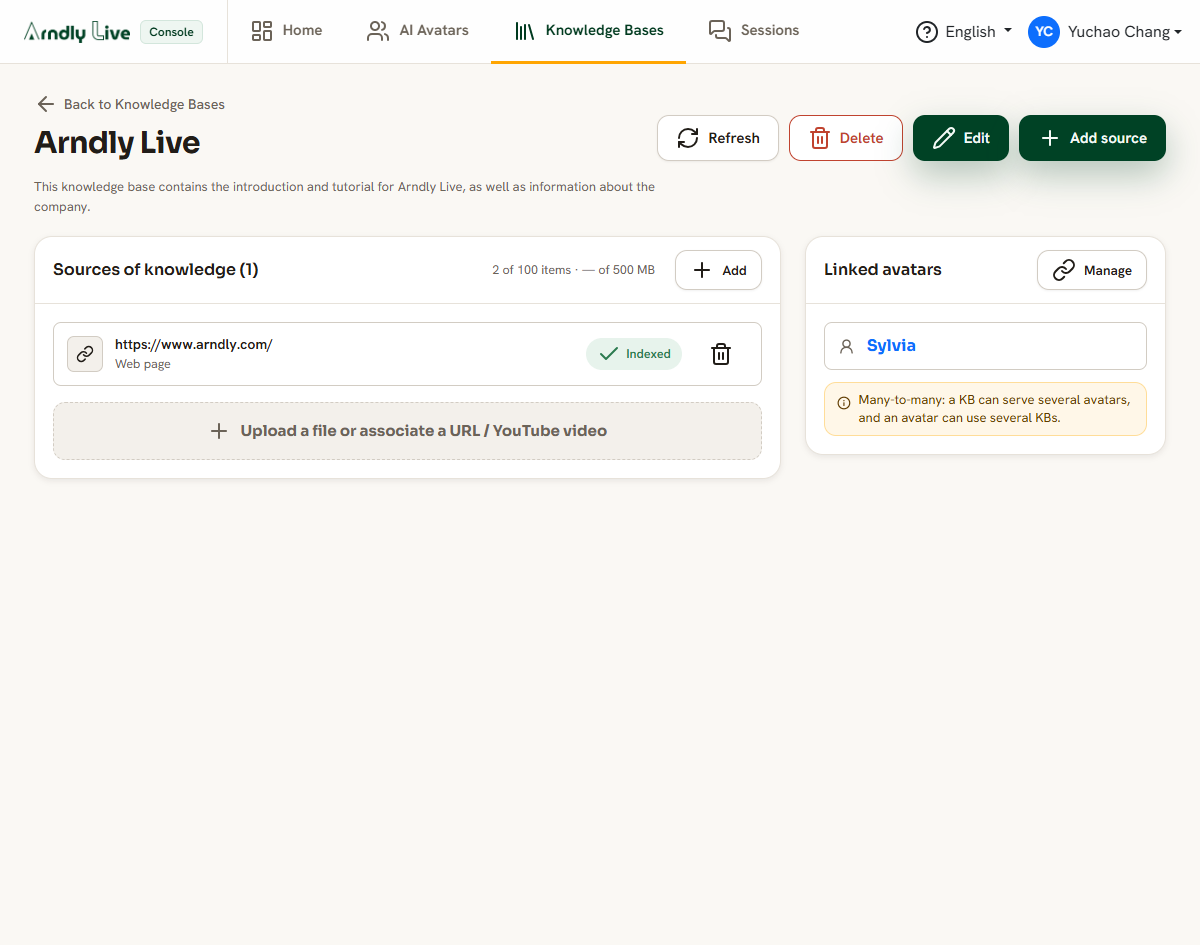
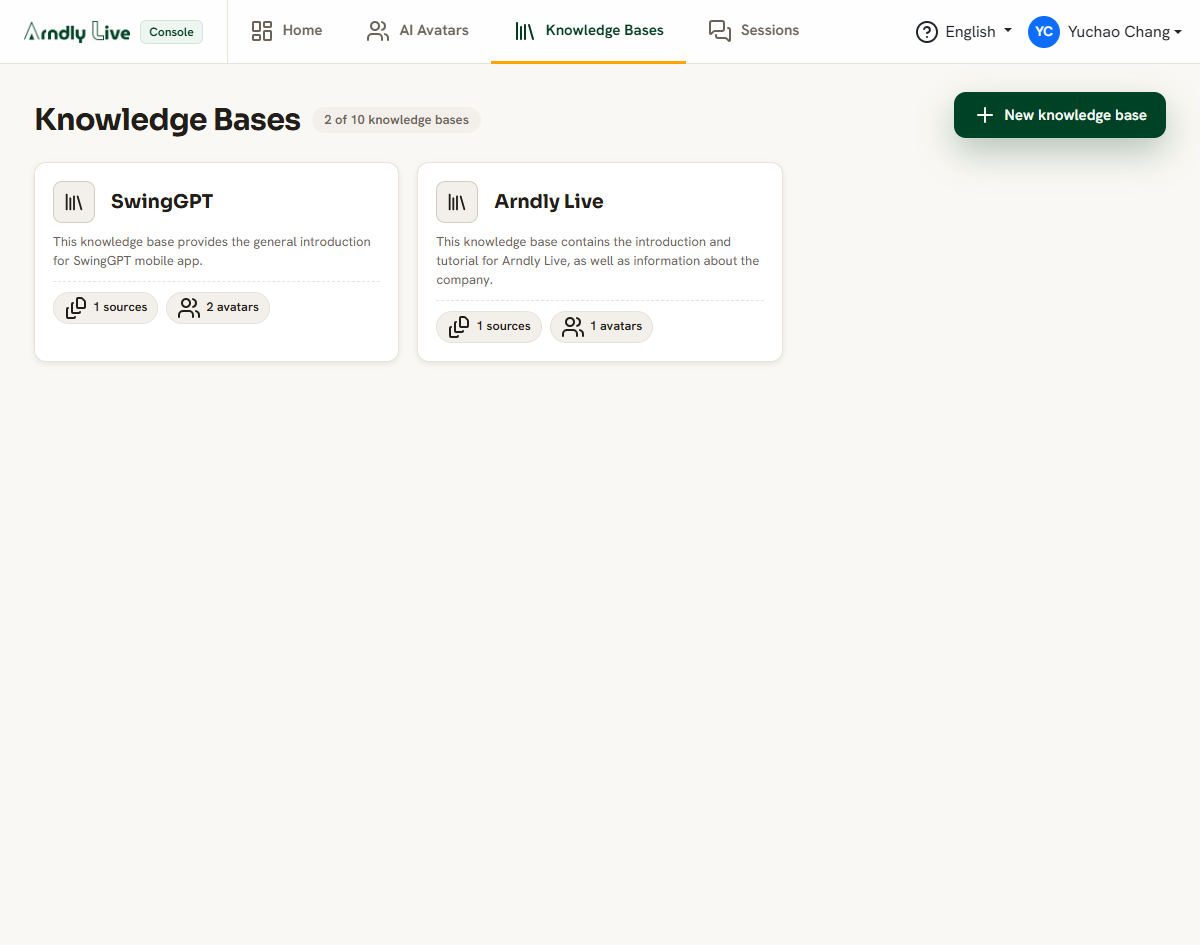
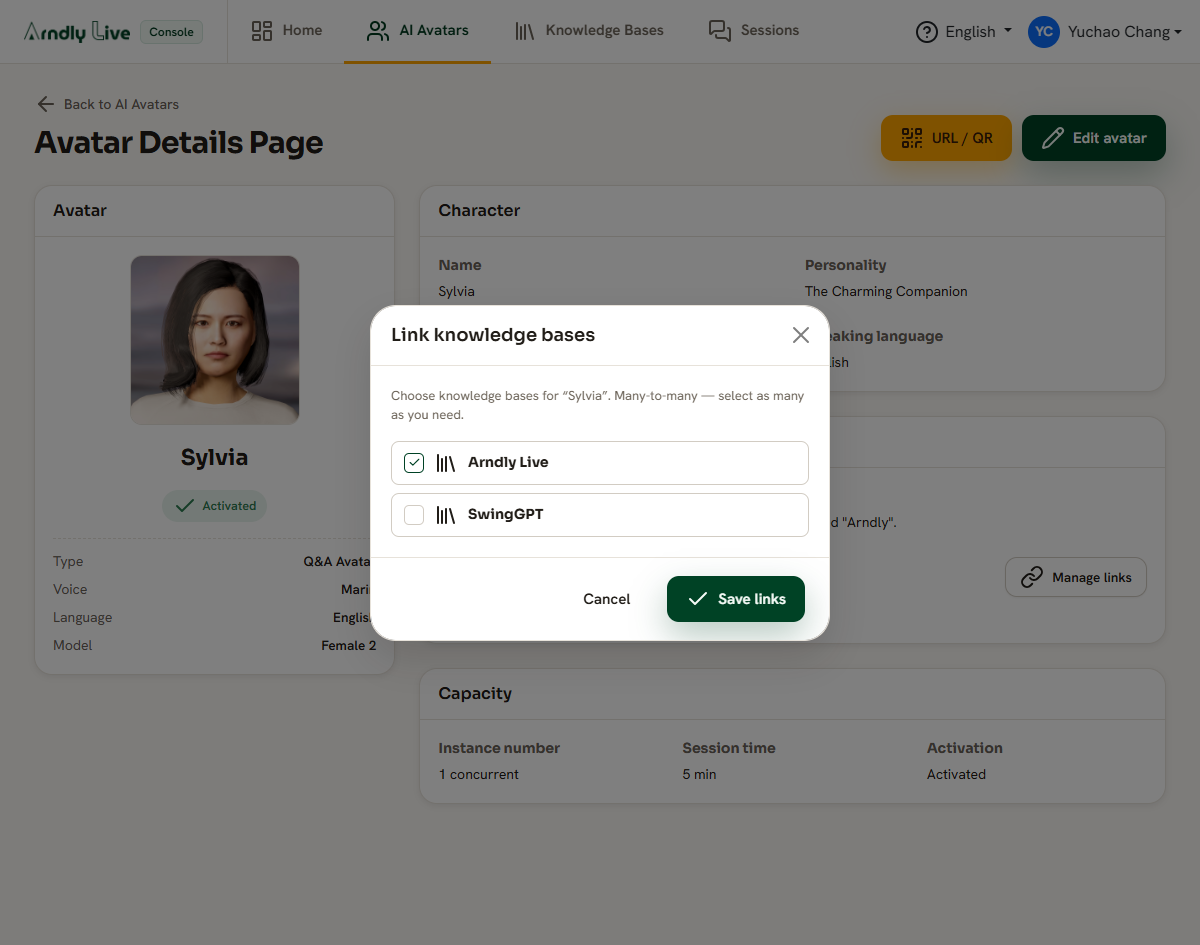
Avatars and knowledge bases are linked in a flexible way: one avatar can use several knowledge bases, and one knowledge base can be shared by several avatars.
You can manage these links from either side — from an avatar's details page, or from a knowledge base's page. During a conversation the avatar searches all of its linked knowledge bases to find the best answer.
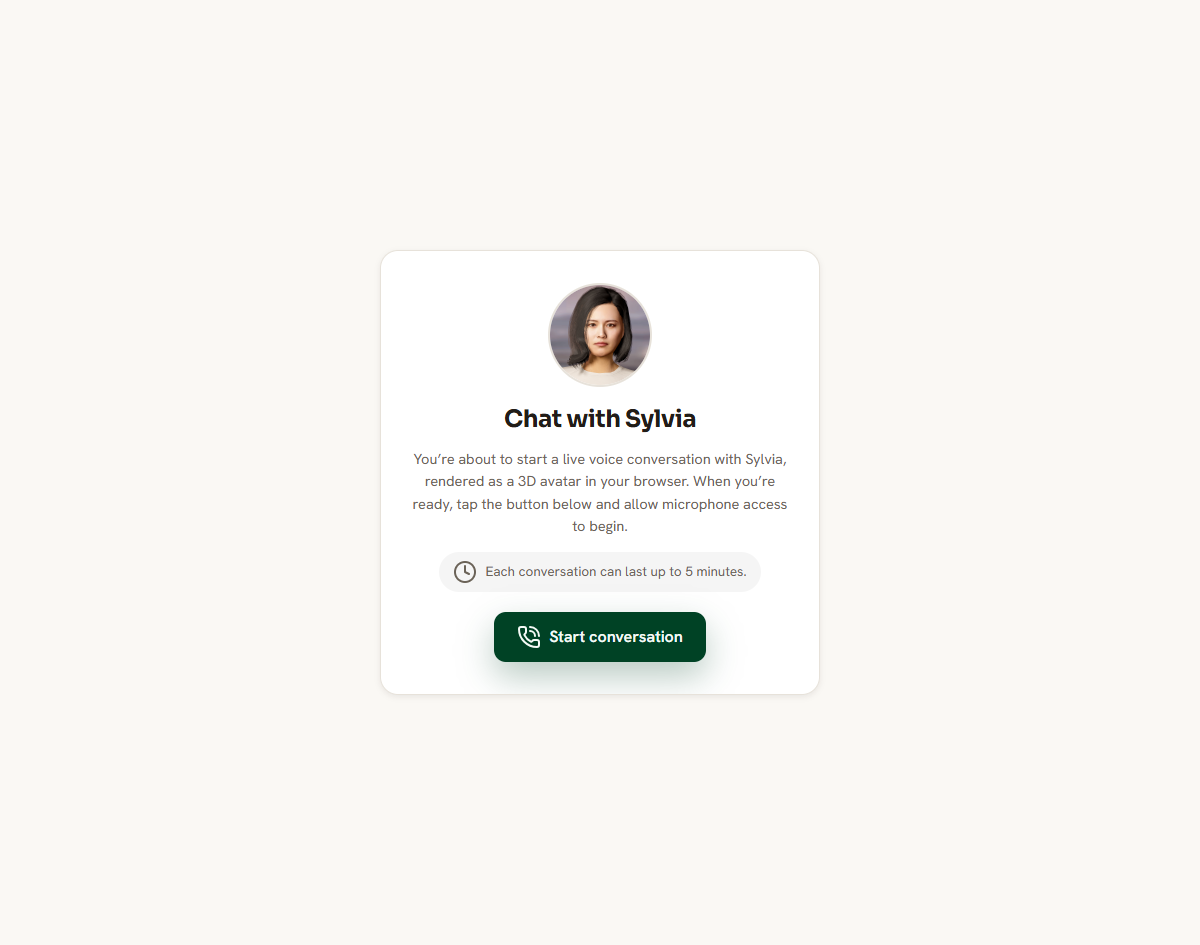
When a guest opens your avatar's link or scans its QR code, they arrive at a public conversation page. No sign-in is required.
- A lobby greets them and invites them to start. Opening the page does not connect anything yet.
- They press Start and allow microphone access. Only then does the conversation begin, in a fresh private room.
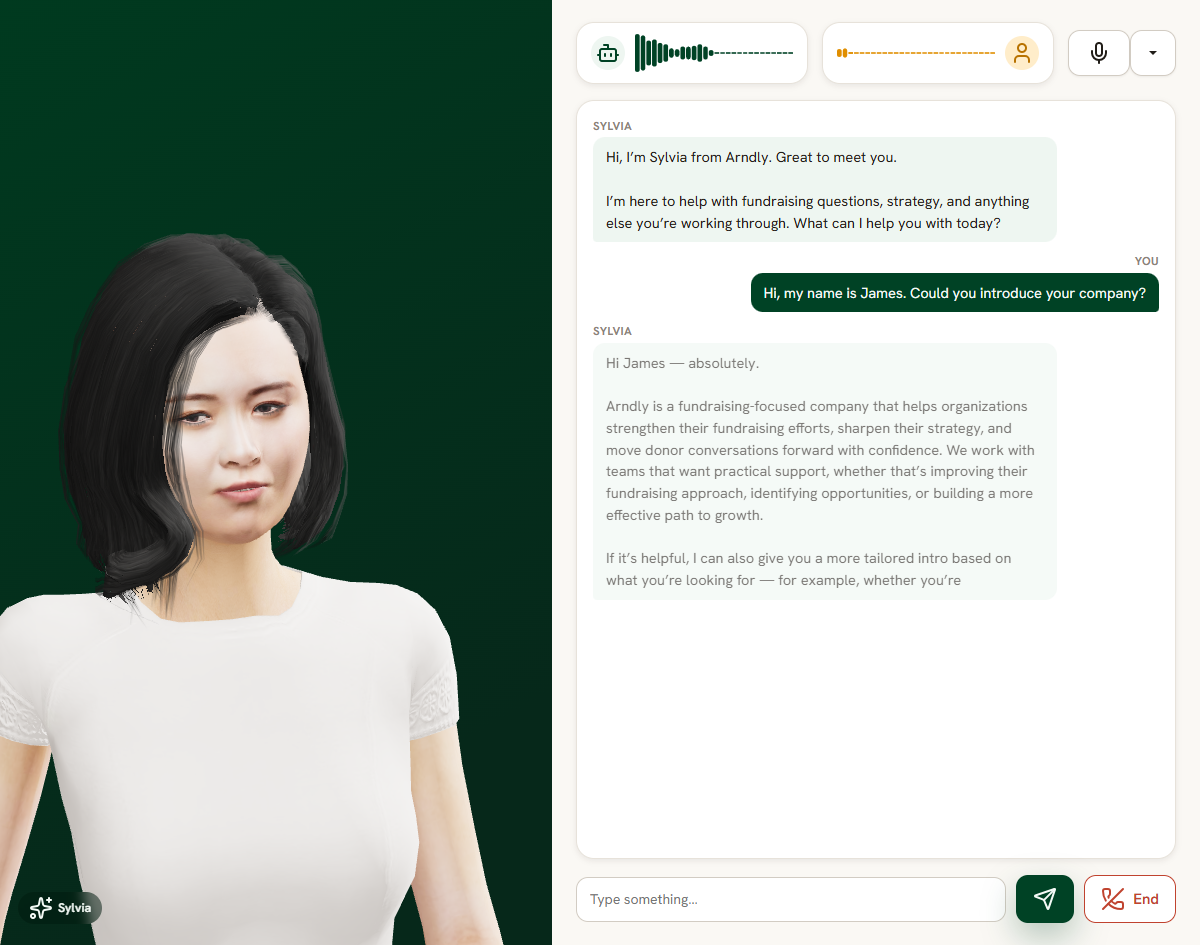
- They talk out loud or type in the text box. The avatar replies with voice, its 3D face moves in sync, and a running transcript appears.
- They can mute the microphone, switch input device, and end the conversation whenever they like.
When the avatar is busy
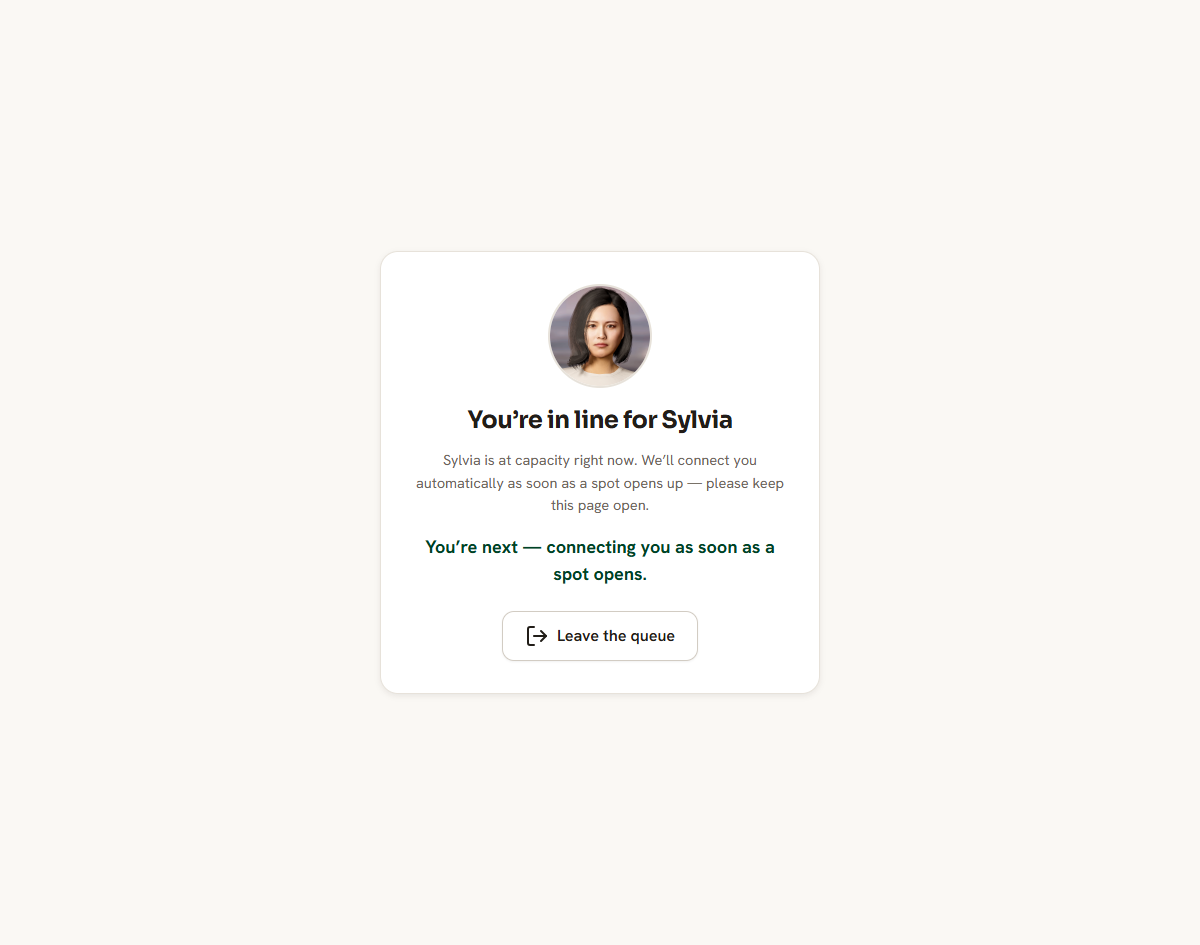
If the avatar is already at its concurrent-session limit, the guest is placed in a waiting room that shows how many people are ahead of them. They are admitted automatically the moment a slot opens, so they never have to keep retrying.
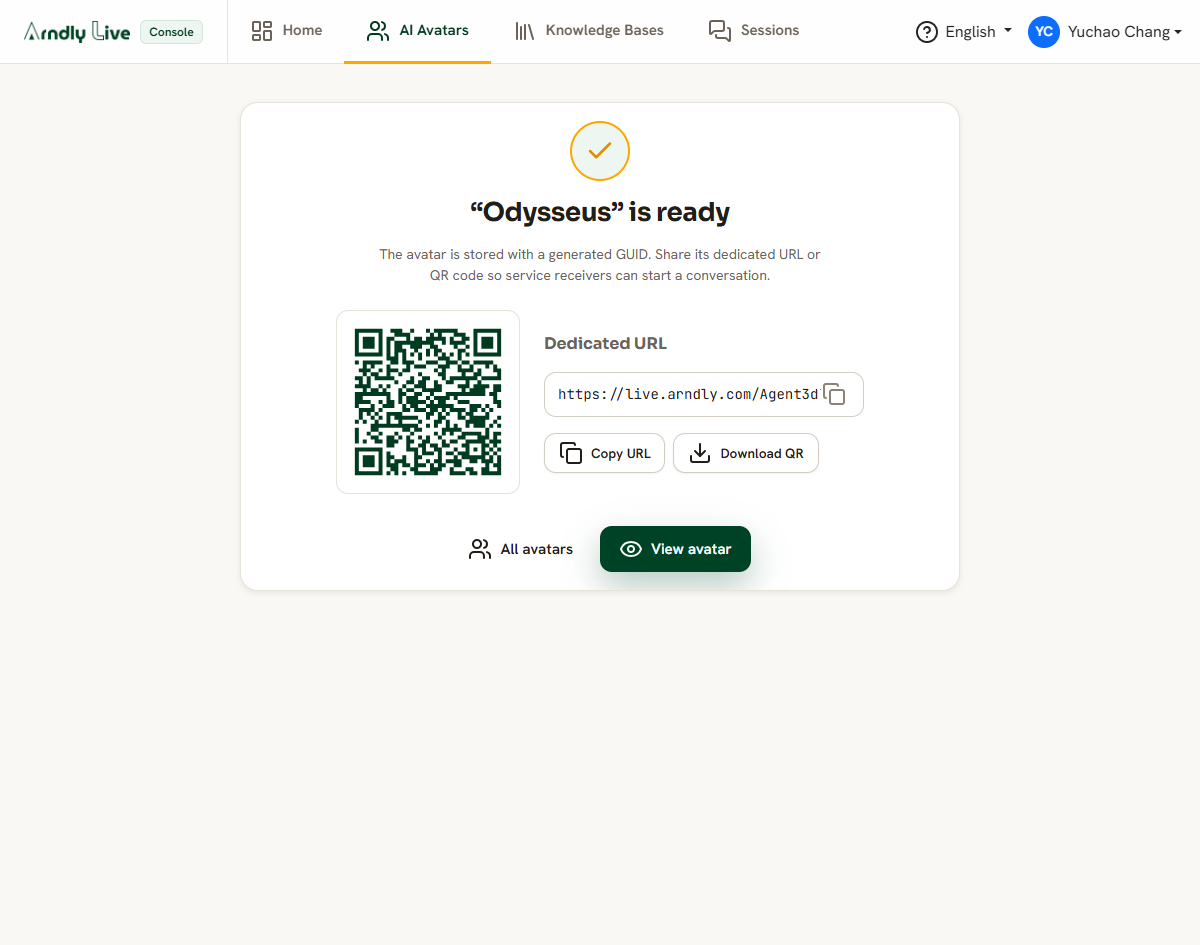
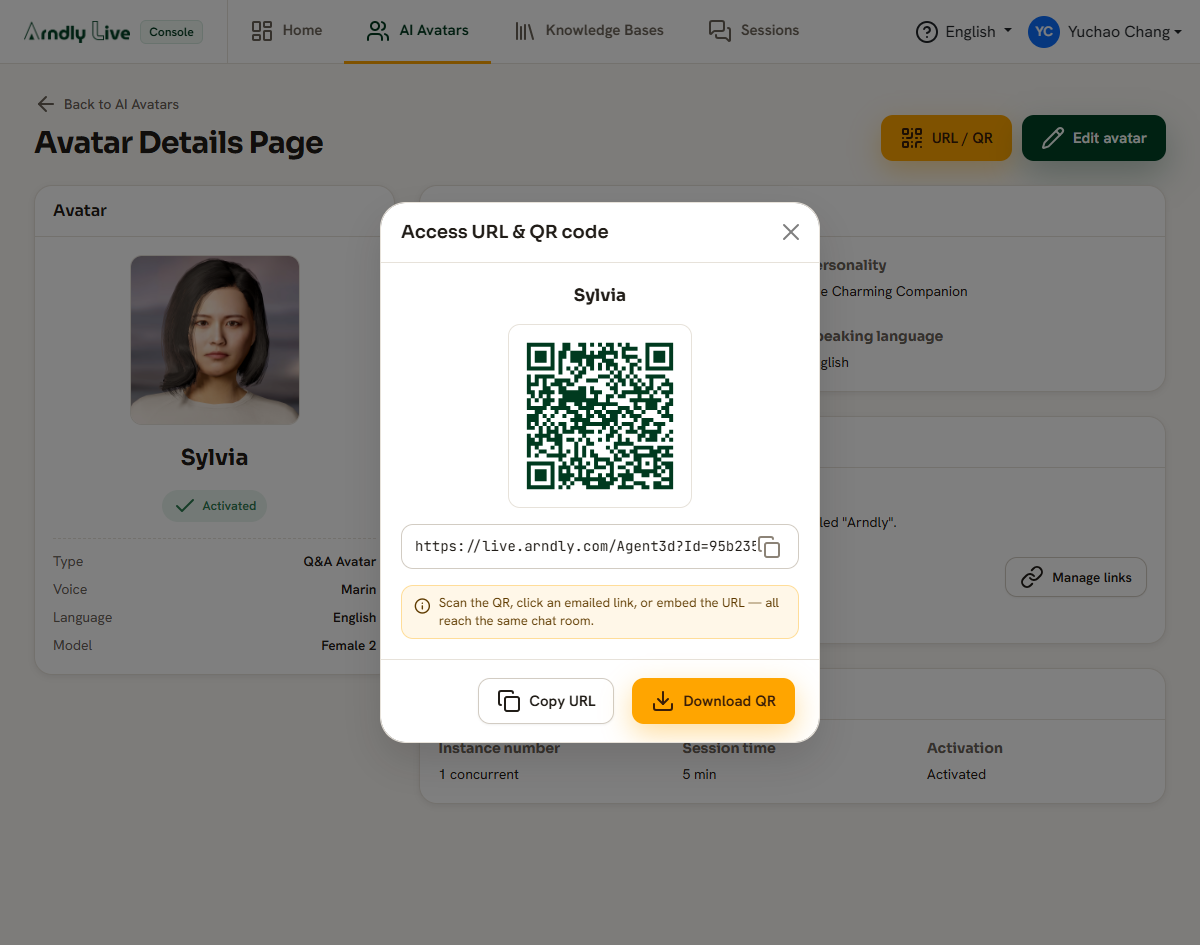
Every avatar has its own dedicated web address and a matching QR code. You will find them on the success screen right after creating an avatar, and any time later on the avatar's details page.
- Copy the link to send it by message, email, or to put on a website.
- Download the QR code to print it on a poster, a card, or a screen for people to scan.
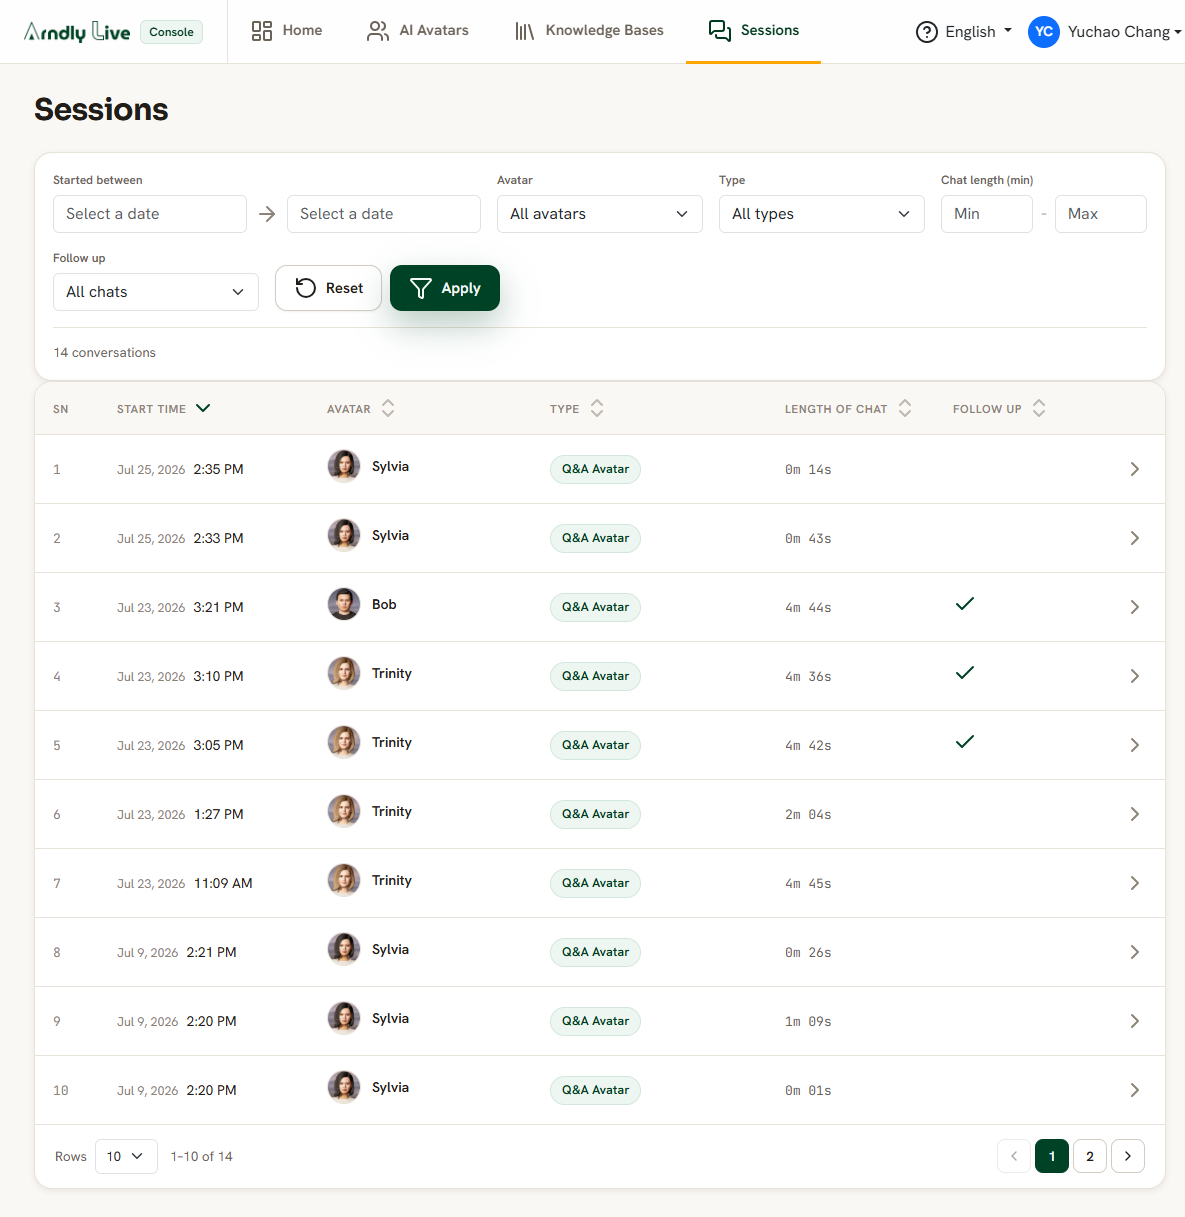
The Sessions page lists every conversation your avatars have hosted. It is where you learn what your guests asked and follow up on the leads they left.
- Filter by date, avatar, type, conversation length, and whether a follow-up is needed.
- Sort the table by any column, and page through large numbers of conversations.
- Open a session to read its automatic summary, the guest's contact details, and the full transcript.
The console and this guide are available in several languages. Use the language selector in the top bar to switch at any time — your choice is remembered for next time.
That is everything you need to get started. Create your first avatar, give it some knowledge, share its link, and watch the conversations come in.
Back to top